Vibrant Warm Color Sunset
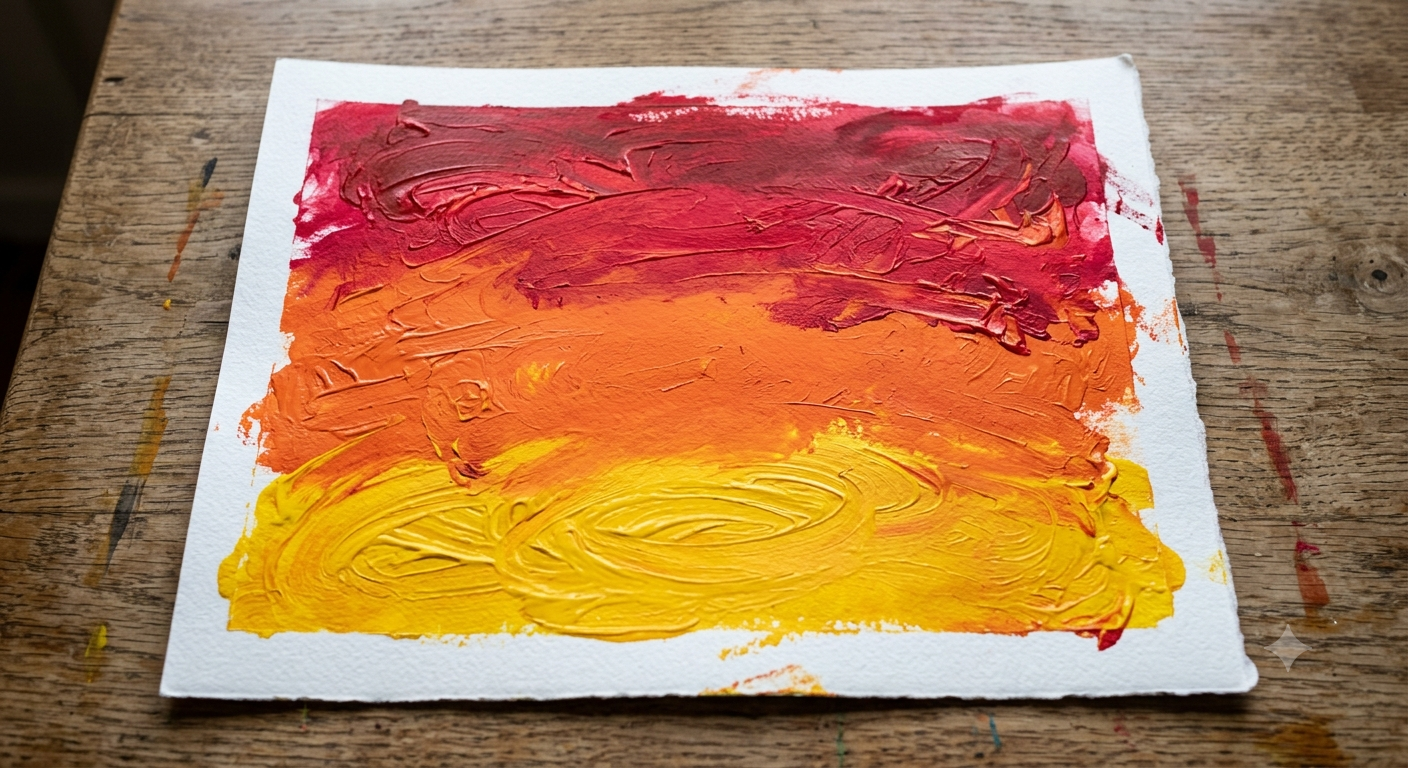
Sunsets are one of nature's most spectacular displays, capturing the imagination of adults and children alike. For young artists, translating the brilliant, glowing sky onto paper is an exciting way to explore color, texture, and expression.
This comprehensive lesson plan guides educators, parents, and caregivers through an engaging, hands-on art project: finger painting a sunset using warm colors only. Specially tailored for children between the ages of 3 and 10, this activity seamlessly blends foundational art history concepts, basic color theory, and sensory exploration into a single dynamic lesson.
Whether you are looking to boost fine motor skills in a preschooler or introduce advanced blending techniques to an elementary student, this versatile warm-color art project is the perfect addition to your curriculum.
Why Focus on Warm Colors?
Before diving into the paint, it is essential to introduce the core artistic concept of this lesson: the color wheel and color temperature.
Colors evoke feelings and moods. Warm colors—specifically red, orange, and yellow—are reminiscent of heat, fire, light, and the sun. By limiting the palette to these three hues, children learn constraint in design while experiencing how these specific colors interact, blend, and intensify one another on the page.
Teaching warm colors through a sunset motif gives children an immediate, real-world reference point. They quickly grasp why blues and greens are left behind for this specific project, establishing a solid foundation for future lessons on cool colors and color contrast.
Developmental Benefits Across Different Age Groups
One of the greatest strengths of this sunset finger painting activity is its adaptability. Children from ages 3 to 10 will approach this project with entirely different developmental milestones and skill levels.
For Toddlers and Preschoolers (Ages 3 to 5)
For the youngest creators, this project is primarily a sensory and fine motor exploration. Squeezing, smearing, and swirling the paint directly with their fingers strengthens hand muscles and promotes tactile awareness. At this stage, the focus is not on realistic representation, but rather on recognizing the names of the warm colors and seeing how they mix together directly on the paper to create new shades.
For Early Elementary Students (Ages 6 to 8)
Children in this mid-range group can begin to focus on directional movement and basic composition. You can introduce concepts like the "horizon line"—where the sky meets the earth—and guide them to use horizontal strokes across the page. They will enjoy experimenting with color gradients, learning how to blend yellow into orange, and orange into red, without creating a muddy mess.
For Older Children (Ages 9 to 10)
For older kids, the challenge shifts to texture, layering, and precision. They can explore how varying the pressure of their fingertips changes the opacity of the paint. They can also experiment with creating a high-contrast silhouette along the bottom of the page once their warm-colored background dries, turning a simple sensory exercise into a striking piece of landscape art.
Essential Materials Needed
To keep this activity fluid and stress-free, gather all your supplies before introducing the project to the children. Because this plan avoids rigid formatting, here is a straightforward checklist of what you will need:
Heavyweight Paper: Use thick cardstock, watercolor paper, or glossy finger-painting paper. Standard printer paper will oversaturate and tear quickly.
Washable Finger Paints: High-quality, non-toxic finger paints in primary red, primary yellow, and vibrant orange.
Painter’s Tape: Optional, but excellent for securing the paper to the table and creating clean, crisp borders.
Damp Cloths or Wipes: Keep these nearby for quick hand cleaning before the inevitably messy transition to the sink.
Black Construction Paper or Black Paint (Optional): For older students looking to add a silhouette layer later on.
Step-by-Step Finger Paint Sunset Lesson Plan
Step 1: Setting the Stage and Setup
Protect your workspace with a disposable tablecloth or butcher paper. Tape down a piece of heavy paper for each child to prevent it from sliding around during the vigorous painting process. Squirt small, distinct dollops of red, orange, and yellow paint directly onto a paper plate or palette for each artist.
Step 2: The Color Warm-Up
Before touching the paper, have a brief discussion with the children. Ask them what a sunset looks like and what colors they see when the sun goes down. Show them the paint palette and ask them to name the temperature of the colors. Reinforce the concept that they are working exclusively with the "warm family" today.
Step 3: Layering the Sky
Instruct the children to start from the bottom of their page using their brightest color: yellow. Encourage them to use their fingers or the palms of their hands to spread the yellow paint horizontally across the lower third of the paper, mimicking the bright light closest to the horizon.
Next, have them dip into the orange paint. Direct them to apply the orange across the middle section of the paper, overlapping slightly with the top of the yellow section. Watch their excitement as they notice a brand-new intermediate shade forming right under their fingertips.
Finally, introduce the red paint at the very top of the paper. This represents the deeper, darker sky furthest from the setting sun. Guide them to sweep the red horizontally, blending it gently downward into the orange layer.
Step 4: Texturing and Blending
Encourage the children to use different parts of their hands to create unique textures in the sky. Swirling motions can represent wispy sunset clouds, while long, smooth strokes create a calm, clear evening sky. Remind them to keep moving horizontally to maintain the classic look of a sunset gradient.
Step 5: Drying and Reflection
Once the paper is covered, carefully peel away the painter's tape to reveal a clean border. Set the artwork aside to dry completely. While the paint dries, gather the children to talk about their experience. How did the paint feel? What happened when the red and yellow met?
Pro-Tips for a Successful, Mess-Free Art Session
Managing a finger-painting session with multiple young children can feel daunting, but a few strategic choices can make it incredibly rewarding:
Limit the Quantity: Start with small dollops of paint. You can always add more, but over-allocating paint upfront leads to thick pools that take days to dry and invite massive messes.
Embrace the Texture: Finger paint is designed to be thick. Encourage children to leave some ridges and peaks on the paper to give the sunset a beautiful, tangible dimension.
Focus on Process over Product: Remind yourself and the children that art is an exploration. If a three-year-old decides to mix all three colors into a single, beautiful shade of sunset coral across the whole page, celebrate their exploration of the materials.
Conclusion
This warm color sunset finger painting lesson plan offers a brilliant balance of sensory play and foundational art education. By tailoring your prompts to the child's age, you can easily guide a classroom or home crafting session into a meaningful exploration of color theory and fine motor expression.