4-Panel Comic Strip
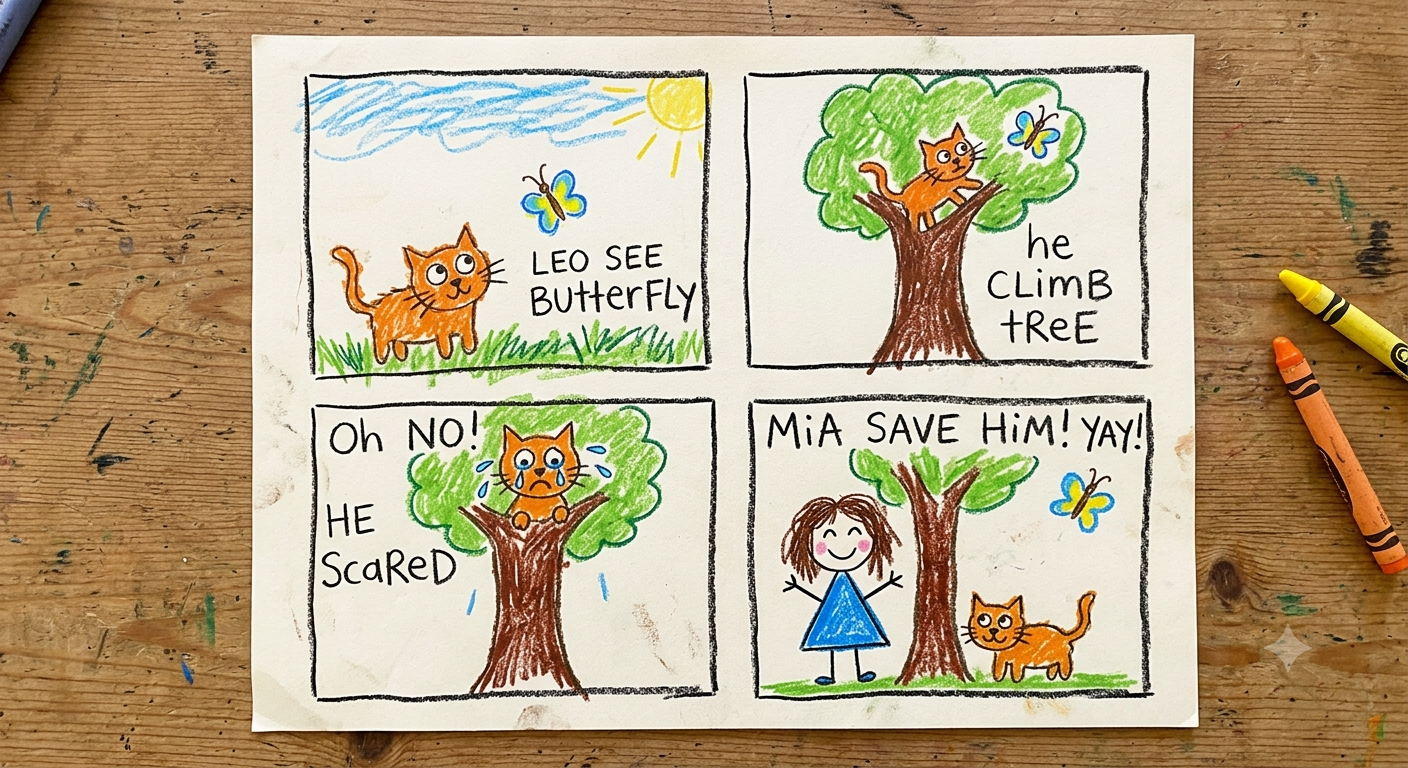
Introducing young children to the world of storytelling doesn't require dense paragraphs or complicated grammar lessons. Sometimes, all it takes is a simple piece of paper divided into four boxes. Creating a 4-panel comic strip is an incredibly engaging art lesson for kids that blends visual arts with foundational literacy skills.
Whether you are designing a curriculum unit for an early childhood classroom, planning an afternoon art activity, or seeking the perfect addition to your resource library, this 4-panel comic strip lesson plan is a versatile, high-impact project. It naturally differentiates itself across ages 3 to 10, allowing early learners to explore cause and effect while challenging older children to refine their narrative pacing.
Why the 4-Panel Comic Works
The 4-panel format is the golden standard for basic storytelling. It prevents young artists from feeling overwhelmed by a massive blank page while providing just enough structure to guide a narrative arc.
When children learn to divide a story into four distinct beats, they are actually practicing sequencing—a critical reading comprehension skill. They learn that events happen in a specific order: first, next, then, and finally. This simple art project lays the groundwork for writing essays, understanding history, and even coding later in life.
The Anatomy of Four Panels
To teach this effectively, it helps to assign a specific narrative job to each box:
Panel 1: The Setup. Who is the character and where are they? (Example: A dog is holding a balloon in a park.)
Panel 2: The Action or Problem. What happens next? (Example: A bird flies too close to the balloon.)
Panel 3: The Climax. The peak of the excitement! (Example: The bird's beak touches the balloon and it goes POP!)
Panel 4: The Resolution. How does it end? (Example: The dog looks surprised, holding only a string, while the bird flies away.)
Adapting the Lesson Across Age Groups
The beauty of this art lesson is how easily it scales based on fine motor skills and cognitive development. Here is how to tailor the project for different stages.
Ages 3 to 5: The Pre-Writers
For preschoolers and kindergarteners, the focus should be entirely on visual sequencing and oral storytelling. At this age, characters might just be circles with smiley faces, or even abstract scribbles—and that is perfectly fine!
The Approach: Have the child draw their story first without worrying about words.
Teacher/Parent Role: Act as the scribe. Ask the child, "What is happening in this first box?" Write exactly what they say beneath the panel. This helps them connect spoken language to written text.
Materials: Large, chunky crayons, washable markers, and 4-panel templates printed on large 11x17 paper to accommodate broad motor movements.
Ages 6 to 8: The Emerging Storytellers
Children in early elementary are beginning to grasp sentence structure and basic spelling. They can start integrating text directly into their art.
The Approach: Introduce the concept of speech bubbles and thought bubbles. Teach them that a speech bubble has a little tail pointing to the character's mouth, while a thought bubble looks like a cloud.
Focus Area: Encourage them to create clear, recognizable characters. If they draw a cat in panel one, ask them how they can make sure it still looks like the same cat in panel four.
Materials: Standard markers, colored pencils, and erasers. Standard 8.5x11 inch templates work well here.
Ages 9 to 10: The Details and Dialogue Masters
Older children can handle complex narratives, distinct settings, and refined illustrations. They are ready to think like real comic book artists.
The Approach: Challenge them to use dynamic angles. Instead of drawing every panel from straight-on, what if Panel 2 is a close-up of the character's face? What if Panel 3 shows a wide shot of the whole scene?
Focus Area: Emphasize pacing and dialogue. Encourage them to draft their script on a piece of scrap paper before committing to the final comic strip.
Materials: Fine-tip black pens for outlining (inking), high-quality colored pencils or alcohol markers, and rulers for drawing their own panels.
Step-by-Step Lesson Plan
Ready to bring this into the classroom or your home art space? Follow these structured steps for a successful art session.
Step 1: Brainstorming (10-15 Minutes)
Never start with a blank page. Begin by discussing favorite cartoons, books, or movies. Break down a familiar story (like The Three Little Pigs) into four main events.
To get the creative juices flowing, offer writing prompts. "What if a dinosaur went to the grocery store?" or "Write a story about a magic pencil." Let the kids share their ideas out loud with a partner before they start drawing.
Step 2: The Pencil Sketch (20-30 Minutes)
Hand out the 4-panel templates and pencils. Instruct the students to sketch lightly. Remind them to leave room for speech bubbles if they plan on using them! Many kids draw a massive character that fills the whole box, leaving no room for the words. A good rule of thumb is to draw the speech bubble first, write the words inside, and then draw the character speaking them.
Step 3: Inking and Outlining (15-20 Minutes)
Once the pencil sketches are complete, it is time to "ink" the comic. Using a black marker or fine-tip pen, have the students trace over their favorite pencil lines. This makes the artwork pop and gives it that authentic, graphic comic book feel. Once the ink is completely dry, they can use an eraser to remove any leftover pencil smudges.
Step 4: Coloring (20-30 Minutes)
Color brings the story to life. Encourage students to think about the mood of their story. If it is a scary story, maybe they use dark blues and purples. If it is a happy story, they can use bright yellows and greens. Remind them to color neatly and thoughtfully, filling in all the white space.
Step 5: The Gallery Walk (10 Minutes)
Art is meant to be shared! Lay all the finished comic strips out on the desks or a large table. Allow the children to walk around the room silently, reading and admiring their peers' work. This validates their effort and provides an audience for their storytelling.
Essential Materials Needed
To keep this lesson smooth, have your art supplies prepped and ready. You do not need expensive materials to make a great comic.
Templates: Pre-printed 4-panel grids on heavy cardstock or drawing paper.
Pencils & Erasers: For the initial sketching phase.
Black Fine-Tip Markers: Sharpies or felt-tip pens for outlining.
Coloring Tools: Crayons (for younger kids), colored pencils, or markers (for older kids).
Optional Extras: Rulers (if older kids want to draft their own panels), stencils for speech bubbles, and scrap paper for brainstorming.
Wrapping Up the Creative Process
Creating a 4-panel comic strip is much more than a fun way to pass an hour. It is a comprehensive educational tool that touches on literacy, spatial awareness, fine motor skills, and creative expression. By giving children a structured canvas, you empower them to organize their thoughts and share their unique perspectives with the world.
Whether they are dictating a story about a flying dog or meticulously inking a detailed superhero saga, they are learning the timeless art of visual communication.