Crayon Leaf Rubbings
Connecting children with the natural world is one of the most rewarding aspects of early childhood and elementary education. In a digital age heavily dominated by screens, hands-on outdoor activities provide an essential sensory experience. One of the most timeless, accessible, and educationally rich activities is the classic leaf rubbing craft.
Using nothing more than fresh leaves, crayons, and simple paper, this activity bridges the gap between creative art and biological science. It is a highly adaptable project, perfectly suited for toddlers just developing their fine motor skills, as well as older elementary students capable of detailed scientific observations. This comprehensive lesson plan provides everything you need to execute a successful, engaging leaf rubbing session with children aged 3 to 10.
Why Leaf Rubbings Make the Perfect Nature Lesson
Leaf rubbing is far more than a simple time-filling craft. It functions as a multi-sensory educational tool that stimulates various developmental domains simultaneously. For younger children, the physical act of holding a crayon flat and applying steady, even pressure builds hand strength and refines fine motor coordination. This serves as an excellent foundational precursor to proper pencil grip and future writing tasks.
For older children, the activity transitions seamlessly into an introduction to botany, ecology, and biology. When a child rubs a crayon over a sheet of paper placed on top of a leaf, the structural anatomy of the plant magically appears on the page. The midrib, lateral veins, and blade margins reveal themselves in sharp contrast. This visualization allows educators to introduce complex scientific vocabulary—such as photosynthesis, chlorophyll, transpiration, and vascular systems—in an interactive, visual manner that sticks with young minds.
Essential Materials and Preparation
One of the greatest benefits of this lesson plan is its minimal requirement for specialized materials. You likely already have everything required inside your home or classroom, making it an exceptionally low-cost and highly sustainable activity.
To begin, gather the following basic supplies:
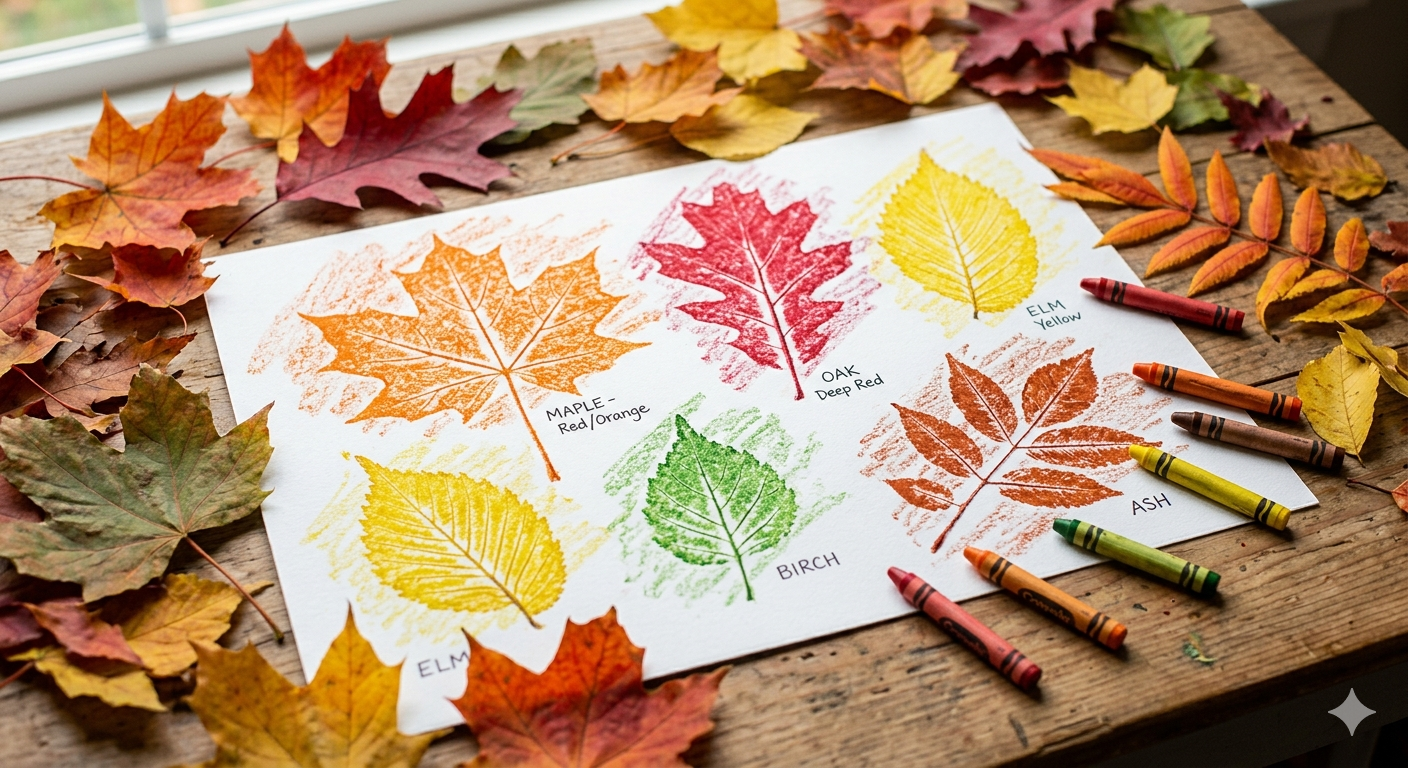
Freshly Gathered Leaves: Collect an assortment of shapes, sizes, and textures. Oak, maple, sweetgum, elm, and fern leaves work exceptionally well because of their prominent, raised vein structures.
Crayons: Standard wax crayons are perfect, but ensure you peel off the paper wrappers entirely. Large, chunky crayons or triangular crayons work best for younger toddlers, while standard crayons work perfectly for older kids.
Paper: Standard white copier paper, lightweight sketching paper, or tracing paper are ideal options. Avoid heavy cardstock or thick construction paper, as these absorb too much of the texture and obscure the delicate vein details.
Securing Tape (Optional): Painter's tape or masking tape can be highly beneficial for younger children to hold their paper and leaves firmly in place during the rubbing process.
Step-by-Step Lesson Guide: The Process
Executing this lesson smoothly requires a clear progression from outdoor exploration to indoor artistic creation. Follow these steps to maximize student engagement and learning outcomes.
Step 1: The Nature Scavenger Hunt
Begin the lesson outdoors. Take the children on a dedicated nature walk through a backyard, park, or school courtyard. Instruct them to look for fallen leaves or carefully collect vibrant leaves from different plants. Encourage them to seek diversity—long leaves, round leaves, jagged edges, and smooth edges. Prompt their observation skills by asking questions: How do the leaves feel? Are they crunchy or flexible? Which side feels bumpier?
Step 2: Sorting and Analyzing
Once you return inside, have the children lay out their collection. Before starting the art portion, spend a few minutes sorting the leaves. You can ask the children to categorize them by size, shape, or texture. Instruct them to turn the leaves over and run their fingertips along the undersides. They will quickly notice that the bottom of the leaf has much more pronounced, raised veins than the smooth top side. This physical discovery is crucial for the success of their artwork.
Step 3: Setting Up the Workspace
Place a leaf on the table with its bumpy side facing upward. Next, place a single sheet of thin white paper directly over the top of the leaf. If you are working with toddlers or preschoolers who struggle with paper slippage, use a couple of small pieces of masking tape to secure the leaf to the table and the paper over the leaf. This removes frustration and allows them to focus entirely on the coloring motion.
Step 4: Executing the Rubbing Technique
Demonstrate the correct technique to the children. Instead of holding the crayon by its tip like a pencil, show them how to hold a peeled crayon completely flat on its side using their thumb and index fingers. Instruct them to press down firmly and rub back and forth smoothly across the area where the leaf is hidden beneath the paper. Watch as the intricate skeletal pattern of the leaf magically appears on the blank page.
Pro-Tip for Teachers: Encourage older students to experiment with color blending by layering multiple shades over a single leaf rubbing, or by overlapping different leaf shapes to create a dense forest floor effect.
Tailoring the Lesson to Different Age Groups
To keep this project highly effective, it is beneficial to adjust your instructional focus depending on the age group of the children you are teaching.
Ages 3 to 5: Sensory Discovery and Fine Motor Focus
For preschoolers, keep the emphasis entirely on sensory exploration, color recognition, and basic motor skill development. Focus heavily on the physical magic of the transformation. Use descriptive words to expand their vocabulary, such as "veins," "lines," "smooth," and "rough." Do not worry about perfect neatness; celebrate the process of discovery as their strokes reveal the hidden patterns.
Ages 6 to 8: Art Techniques and Basic Anatomy
Early elementary students can focus on artistic expression and basic plant anatomy. Teach them to identify the different parts of the leaf, such as the stem (petiole), the main central vein (midrib), and the outer edge (margin). You can guide them to use autumnal colors like deep reds, oranges, yellows, and browns to create realistic seasonal displays, or challenge them to create geometric patterns using overlapping rubbings.
Ages 9 to 10: Advanced Scientific Inquiry and Botanical Labeling
For older children, elevate this activity into a legitimate science lab notebook entry. After completing their rubbings, have them use a fine-tip black marker to draw arrows and neatly label the leaf anatomy: the apex, margin, veins, midrib, and petiole. You can introduce leaf classification systems, requiring them to research and determine whether their leaf came from an angiosperm or gymnosperm, and whether it has a palmately or pinnately veined pattern.
Wrapping Up the Lesson
Conclude your leaf rubbing activity with a brief group reflection or sharing circle. Allow each child to showcase their favorite print and explain what type of leaf they used or what they discovered about its structure. This builds confidence, reinforces the vocabulary learned during the session, and honors their creative effort. Gathered together, these colorful rubbings can be bound into a class nature book or displayed on a seasonal bulletin board to celebrate the beauty of nature.