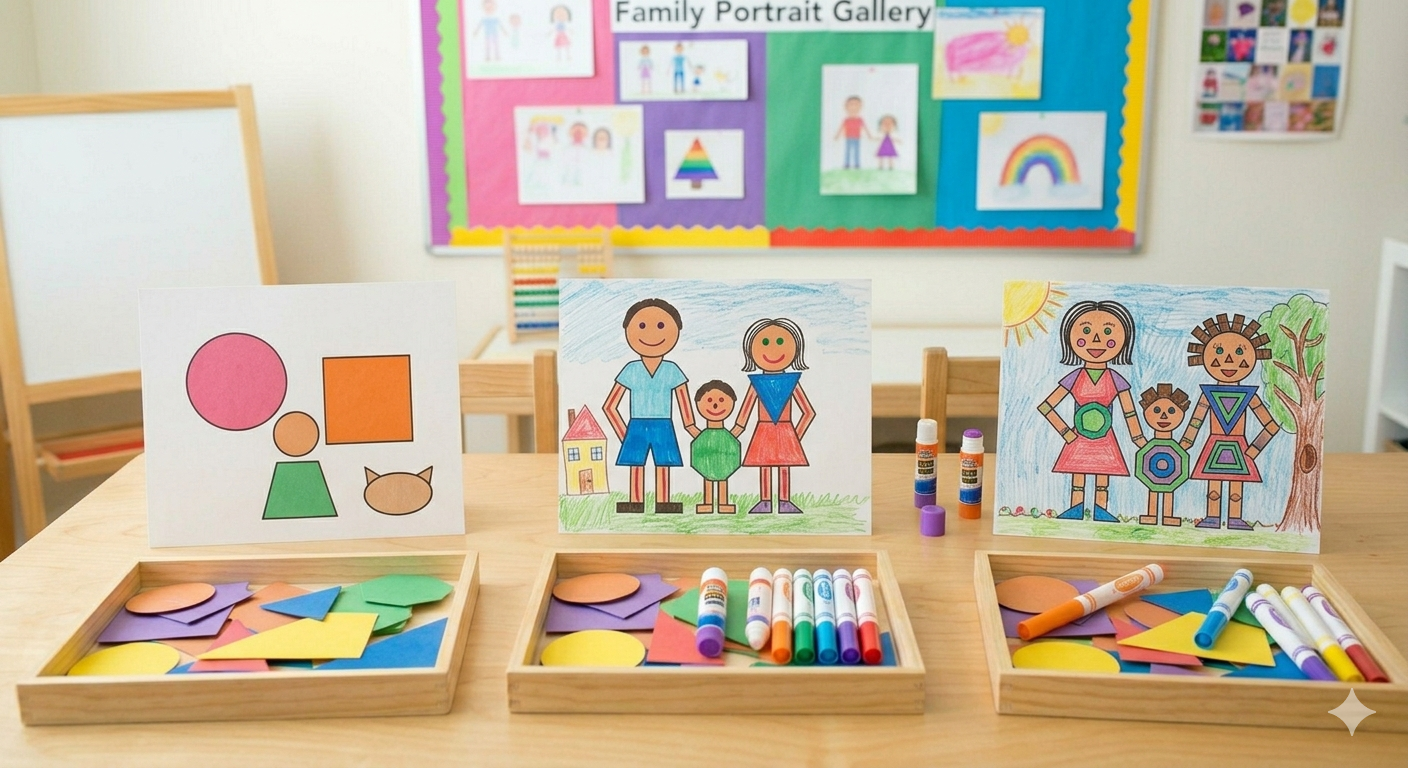
Shape-Based Family Portrait
Getting young kids to sit down and draw a family portrait can sometimes feel like a masterclass in managing creative chaos. For a three-year-old, a "portrait" might look like a wild scribble with two floating eyes. For a ten-year-old, perfectionism can kick in, leading to frustration when a hand or nose doesn't look "right."
Enter the Shape-Based Family Portrait.
By stripping away the pressure of realistic drawing and focusing purely on fundamental geometric shapes, you unlock an accessible, highly engaging art lesson. It bridges the gap between developmental stages, making it an ideal project for multi-age classrooms, homeschooling families, or afternoon art sessions. Here is a comprehensive, step-by-step guide to executing a flawless, low-prep art lesson plan that children ages 3 to 10 will love.
Why Focus on Shapes? The Developmental Benefits
Before diving into the markers and paper, it helps to understand why this constraint is actually a creative superpower. Teaching children to view the world through a lens of basic geometry builds critical cognitive and artistic foundations.
For Ages 3 to 5 (Early Childhood): At this stage, children are mastering fine motor skills and learning to name shapes. Translating a real-world concept (like "Daddy") into a circle and a rectangle reinforces spatial awareness, shape recognition, and hand-eye coordination.
For Ages 6 to 8 (Early Elementary): Kids in this bracket are transitioning from symbolic drawing to observational drawing. Using shapes gives them an analytical framework. They begin to notice proportions—for instance, realizing that a torso is larger than a head, or that arms can be represented by thin rectangles.
For Ages 9 to 10 (Upper Elementary): Older children often battle creative block or frustration because their technical skills haven't caught up to their vision. Forcing them to use only shapes breaks the perfectionism loop. It pushes them into the realm of abstract, stylized art and graphic design.
The Complete Lesson Plan: “My Geometric Family"
This lesson is designed to last roughly 45 to 60 minutes. It requires minimal preparation and uses standard art supplies you likely already have on hand.
Target Age Group
Ages 3 to 10 (with adaptations for different skill levels).
Core Materials
Heavy white construction paper or cardstock (8.5" x 11" or larger)
Pre-cut colored paper shapes (for younger children)
Construction paper in assorted colors (for older children to cut their own)
Child-safe scissors and glue sticks
Black markers or oil pastels (for outlining)
Bright markers, crayons, or colored pencils
Step-by-Step Lesson Execution
To keep the classroom or kitchen table organized, follow this sequential structure to guide the young artists through the process.
Step 1 - The Shape Hunt (Warm-Up): 5-10 minutes.
Gather the children and look at pictures of people or look at each other. Ask targeted questions: "What shape is your head? What shape is your shirt?" Help them see that a head is an oval or circle, a torso is a rectangle or square, and legs are long rectangles.
Step 2 - The Concept Setup: 5 minutes.
Introduce the golden rule of the project: No organic or squiggly lines allowed. Everything—from eyes to hair to shoes—must be built out of recognizable shapes (circles, squares, rectangles, triangles, ovals, diamonds, or trapezoids).
Step 3 - Scaffolding by Age Group: 20-25 minutes.
Ages 3–5: Provide a tray of pre-cut paper shapes. Let them arrange the shapes on their paper like a puzzle to build their family members before gluing anything down.
Ages 6–10: Challenge them to cut out their own shapes from colored paper, or use a pencil and ruler to draw an entirely geometric composition directly onto their white paper before coloring.
Step 4 - Details and Features: 10 minutes.
Encourage the kids to layer smaller shapes for details. Two tiny circles for eyes, a small triangle for a nose, or a series of small rectangles for hair. This adds depth and personality to their stylized portraits.
Step 5 - The Black Outline Finish: 5 minutes.
Have older children trace over the edges of their shapes with a thick black marker or oil pastel. This replicates a graphic design aesthetic and makes the colors pop dramatically.
Tailoring the Challenge: Age-Appropriate Modifications
To keep this lesson truly inclusive for a wide age spread, use these specific modifications to ensure no one is bored and no one is overwhelmed.
Toddlers & Preschoolers (Ages 3–4)
Keep it strictly tactile. Focus less on a "perfect" family representation and more on the physical act of gluing a circle on top of a square. If a child decides a giant green triangle is their sister, celebrate the abstraction!
Early Elementary (Ages 5–7)
Introduce the concept of scale. Ask them to think about who the tallest person in their family is and select a larger rectangle for that person's torso. Introduce triangles for skirts or dresses, and ovals for arms.
Older Innovators (Ages 8–10)
Push them toward complex geometry and storytelling. Encourage them to look beyond circles and squares. Challenge them to incorporate parallelograms, hexagons, or trapezoids. Ask them to show action: "Can you make a shape-based dog chasing a shape-based ball?" They can also experiment with overlap, placing one family member slightly in front of another to create structural depth.
Art Teacher Pro-Tip: To tie this lesson into art history, show the children works by Pablo Picasso (Cubism) or Paul Klee. Explain that famous adult artists use shapes to tell stories and express feelings all the time!
Key Takeaways for Teachers and Parents
When evaluating the final pieces, leave your traditional expectations at the door. The goal of this lesson plan isn’t realism—it’s spatial logic, critical thinking, and design execution.
When a child finishes, don't just say, "Good job." Instead, ask them about their geometric choices: "I love how you used a trapezoid for mom’s shirt, what made you pick that shape?" You’ll be amazed at the design theory coming out of a seven-year-old’s mouth.
Gather your materials, embrace the clean lines of geometry, and enjoy watching your young artists build their families block by block, shape by shape.