Torn Paper Landscape Collage
Are you looking for a low-prep, high-engagement art project that works for both a wiggly three-year-old and a detail-oriented ten-year-old? Look no further than the torn paper landscape collage.
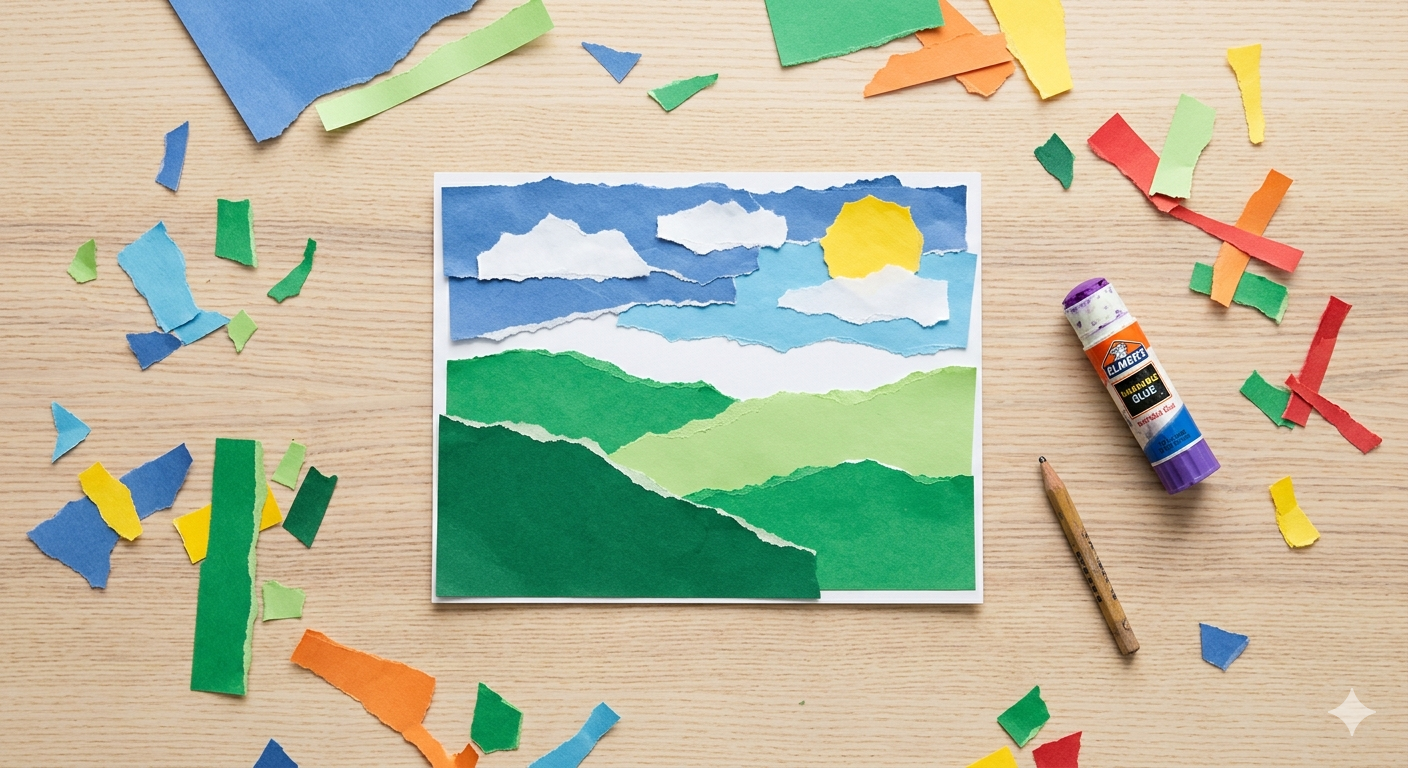
This classic art lesson plan uses simple materials you already have in your cabinet: construction paper, glue, and a background sheet. By tearing paper instead of cutting it, kids get a wonderful tactile experience while creating beautiful, layered hills, a bright sky, and a glowing sun.
Let’s dive into why this project is an art room staple and how you can adapt it for different age groups.
Why Torn Paper Art is Great for Child Development
Before we jump into the steps, let's talk about why ripping up paper is actually fantastic for young learners.
Fine Motor Skills: Tearing paper requires kids to use their "pincer grasp" (the thumb and index finger working together). This builds the exact hand strength needed for writing with pencils and using scissors later on.
Embracing Imperfection: For perfectionist kids, a blank page and a pencil can be intimidating. A single wrong line can cause frustration. Torn paper removes that pressure. There are no straight lines in nature, so every rip is a success.
Spatial Awareness and Layering: Building a landscape forces kids to think about foreground, middle ground, and background. They learn that to make a hill look "behind" another hill, they have to glue it down first.
Lesson Plan Overview & Materials
Target Age: 3 to 10 years old (with adaptations)
Time Required: 30 to 45 minutes
Learning Objectives: Explore texture, practice spatial layering, and develop fine motor skills.
Supply List
You don't need anything fancy for this project:
Heavy background paper: Light blue or white cardstock (9x12 inches works best).
Colored construction paper: Shades of green and brown for the hills; yellow or orange for the sun; white or blue for the sky and clouds.
Glue: Glue sticks are best for younger kids; liquid school glue with a brush works well for older kids.
A damp cloth: Keep one handy for sticky fingers!
Step-by-Step Guide: Building the Landscape
To make this project successful, teach kids to build their landscape from the top down or from the back to the front.
Step 1: The Sky and Sun (The Background)
Start at the very top of the page. Kids can use a solid blue sheet for their background, or they can tear strips of dark blue, light blue, and purple to create a textured, streaky sky.
Next comes the sun. Have them tear a circle out of yellow or orange paper.
Teacher Tip: Tearing a circle is tough! Instruct kids to make small, incremental tears as they turn the paper in a wheel motion to round out the edges. Glue the sun down onto the sky layer.
Step 2: The Distant Hills (The Middle Ground)
Choose a darker green or a cool blue-green for the hills that sit furthest away. Tear a wavy line all the way across a strip of paper. Glue this layer down so it overlaps the bottom of the sky and the lower edge of the sun.
Step 3: The Front Hills (The Foreground)
Choose a brighter, lighter green for the closest hills. Tear another wavy strip. Glue this piece so it overlaps the bottom of the distant hills. This creates instant depth! Suddenly, the artwork has dimension, mimicking how real mountains look outside.
How to Adapt This Lesson for Ages 3 to 10
The beauty of this project is its scalability. Here is how to adjust the complexity depending on who is sitting at your art table:
For Toddlers & Preschoolers (Ages 3-5)
At this stage, focus purely on the sensory joy of ripping and sticking.
Prep Work: Cut the construction paper into manageable 2-inch strips beforehand. Little hands have trouble tearing a giant 9x12 sheet.
Simplify: Don’t worry too much about perfect landscape placement. If their sun ends up buried under a hill, celebrate it as a "sunset!"
Glue Strategy: Give them glue sticks. They love the independence, and it keeps the mess manageable.
For Early Elementary (Ages 6-8)
Children in this bracket can grasp the concept of overlapping and perspective.
Incorporate Color Mixing: Encourage them to look at how light changes colors. Can they put a lighter green on top of the hills where the sun hits, and a darker green in the "shadows"?
Add Details: Introduce elements like torn-paper tree trunks, simple flowers, or a winding blue river cutting through the valley.

For Older Kids (Ages 9-10)
Older students can take this simple concept and turn it into a sophisticated mosaic style.
High Texture: Instead of tearing long strips for hills, challenge them to tear tiny, confetti-sized squares of paper. They can piece these together like tiles to form complex gradients and shadows.
Monochromatic Schemes: Challenge them to use five different shades of just one color to create a dramatic, atmospheric landscape.
Clean-Up Tips for Classrooms and Homes
Collage projects can leave a sea of paper scraps behind. Turn clean-up into a game!
Give kids a simple rule: "Sort before you scrap." Have one bin for large pieces that can be saved for future projects, and another bin for tiny scraps destined for the recycling bin. A quick sweep with a dry hand gathers paper confetti into a pile easily, leaving your space clean and your young artists proud of their masterpieces.